
How to Remove Clutter From Real Estate Photos Without Hiding Property Defects
Decluttering should remove distractions, not evidence. Learn what is normally safe to remove, what should remain, and how to review every final.
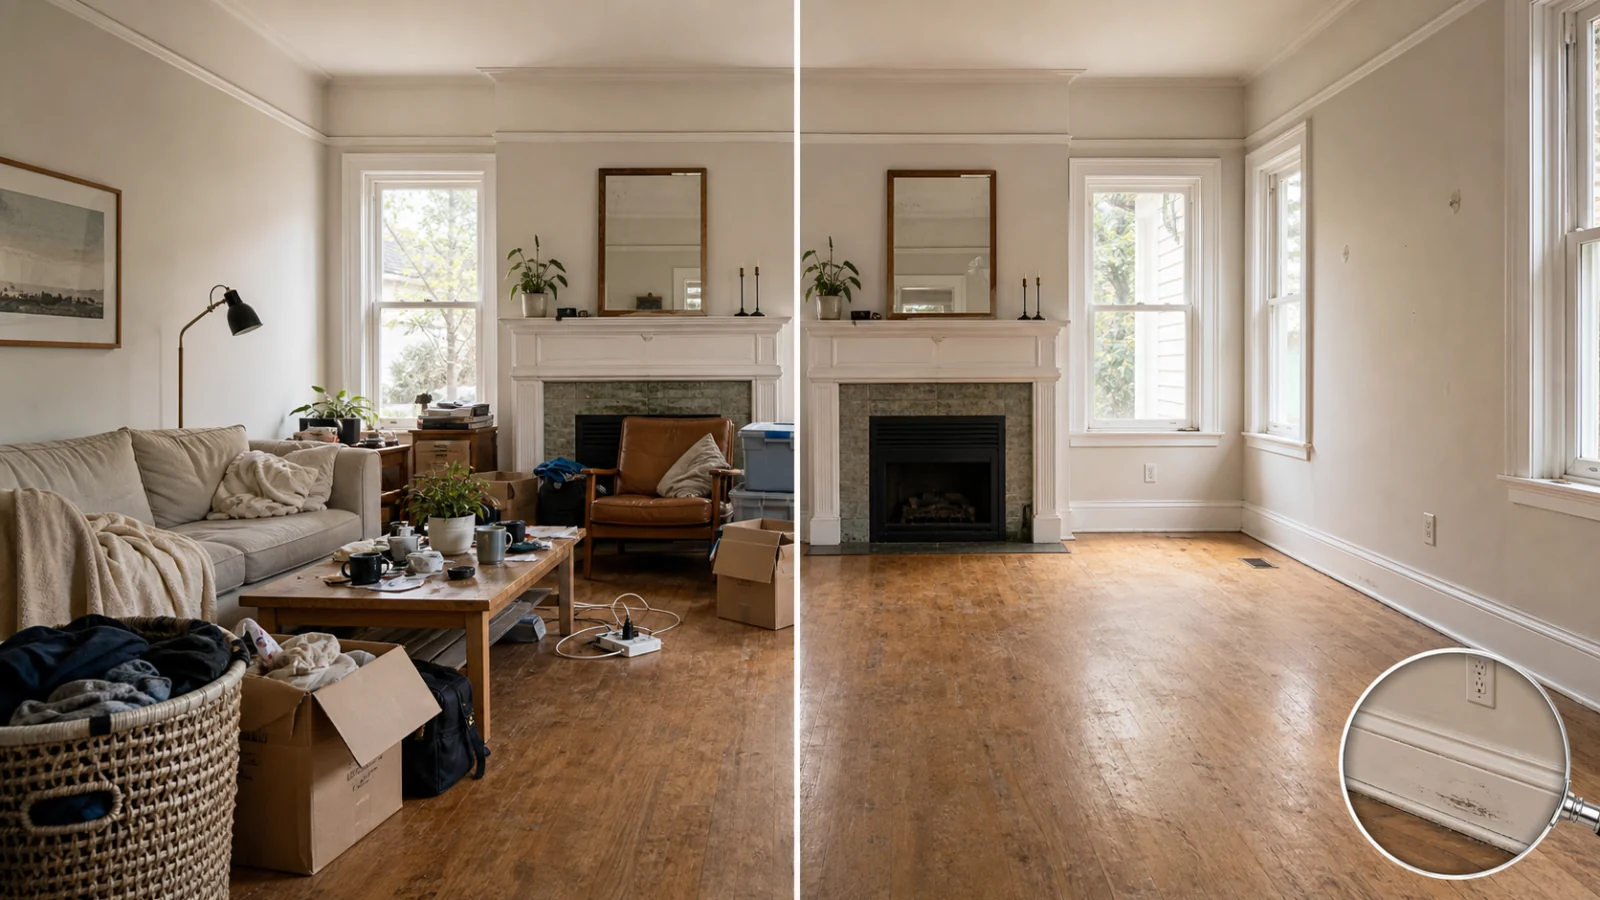
Safe photo decluttering removes temporary personal items while preserving the property buyers are evaluating. Boxes, loose cables, laundry, toiletries, small countertop items, and movable bins may be reasonable candidates when the client authorizes them. Cracks, stains, damaged flooring, missing fixtures, utility equipment, built-ins, views, room boundaries, and permanent exterior context should remain. Work from the original, remove one region at a time, and compare the result beside the source at full resolution. If the tool must invent a large hidden area or if the removed object covers important condition, reshoot or publish the source rather than guessing. Keep the original with the final and confirm applicable disclosure rules.
Decluttering is not the same as repair
The practical test is whether the removed item could be picked up before a showing without changing the property. A stack of moving boxes can be moved. A floor stain under those boxes cannot be digitally repaired as part of the same request. A shampoo bottle can leave a bathroom counter. A cracked sink cannot.
This distinction is simple in principle and difficult in pixels. Object-removal tools reconstruct whatever was hidden. When the hidden background is repetitive flooring or a blank wall, the result may be plausible. When it includes damage, a utility connection, a complex reflection, or an unknown boundary, the output becomes a guess.
Create three removal categories
Usually low risk
- Loose papers, toiletries, dishes, and small decor.
- Cables that are not fixed wiring.
- Laundry baskets and movable storage boxes.
- Temporary cleaning supplies.
- Photographer equipment accidentally left in frame.
Review with the listing professional
- Large furniture that hides walls or floors.
- Children’s items, pet equipment, or mobility aids that affect privacy.
- Vehicles, waste bins, hoses, and exterior maintenance items.
- Wall art or electronics that leave unknown mounting evidence.
- Reflections of people or personal information.
Do not treat as routine clutter
- Cracks, stains, water marks, holes, or broken materials.
- Permanent fixtures, utility meters, radiators, vents, and safety devices.
- Neighboring structures, power lines, fences, and easements.
- Built-in appliances, cabinetry, plumbing, and electrical features.
- Anything removed to imply a different room size or condition.
Local rules and client policies may be stricter. The reviewer, not the removal model, decides what belongs in scope.
Inspect what the object was hiding
Before removing an item, zoom in on its edges and ask what continues behind it. Floorboards have direction and spacing. Baseboards have joints. Tile has grout lines. Mirrors and glossy surfaces contain reflections. If you cannot infer the hidden surface from surrounding evidence, the final should not pretend certainty.
Use a small mask with generous context rather than selecting half a room. Adobe’s current Remove tool can use generative AI, non-generative processing, or automatic selection. That flexibility changes how a fill is produced, not whether the fill is appropriate for a listing.
A source-first removal workflow
Record the request
Mark each requested object on a copy of the source. Have one decision-maker approve the list. Do not accept an open instruction to “clean everything up.”
Protect fixed features
Identify walls, trim, flooring, outlets, switches, vents, fixtures, windows, doors, and views near every mask. Preserve their shape and condition.
Remove one region at a time
Small edits are easier to audit. After each removal, check:
- Repeating textures and cloned patterns.
- Bent floorboards, grout, trim, or reflections.
- Missing contact shadows from objects that remain.
- Newly invented outlets, handles, or edges.
- Smeared surfaces and abrupt sharpness changes.
Compare source and final
Use synchronized zoom and toggle frequently. A polished final viewed alone encourages confirmation bias. The original reveals whether the room quietly expanded or a mark disappeared.
Retain both files
Name source and final clearly. Keep the mask or edit record when practical. If the final is challenged, the team can explain exactly what was removed.
When a reshoot is better
Digital removal is the wrong tool when:
- The clutter covers a large percentage of the room.
- The space behind it is not visible elsewhere.
- Reflective surfaces multiply the object.
- Moving the item physically would take less time than careful reconstruction.
- The item may hide material condition.
- The edit would need to invent permanent property detail.
Ask the occupant or agent to prepare the room, then photograph it again. Physical preparation also produces correct shadows, reflections, and multiple angles automatically.
Review the entire property set
An item removed from one image may still appear in another angle or in a mirror. That inconsistency can be more confusing than leaving it. Place related views together and identify every occurrence before editing.
Also check whether removal changes the story of the room. Clearing a desk in one angle while leaving office equipment in another is usually harmless; removing all evidence of a large appliance or access feature may be material. Use one approved scope across the set.
Deliver decluttered files as versions
Do not overwrite the original. Use a suffix or version record that identifies the decluttered final and keep the exact source association. If the image later receives staging, start the staging project from the approved cleared version but retain the untouched original as the ultimate reference.
This chain makes it possible to audit which step removed an item and prevents repeated generative edits from obscuring earlier mistakes.
Quality-control checklist
- ☐ Every removed item was explicitly in scope.
- ☐ The source is retained and paired with the final.
- ☐ No permanent property feature was removed or redesigned.
- ☐ Visible defects and material condition remain.
- ☐ Floor, wall, trim, tile, and reflection patterns continue naturally.
- ☐ Room boundaries and perceived dimensions are unchanged.
- ☐ No duplicate texture or generative artifact remains.
- ☐ Multiple photos of the same area tell a consistent story.
- ☐ The listing professional reviewed disclosure requirements.
The MLS photo compliance guide provides a wider publishing review, while the before-and-after checklist helps organize source-to-final evaluation.
Frequently asked questions
Can I remove a trash bin or parked car?
Possibly, but exterior context and local listing rules differ. Obtain approval, retain the source, and avoid changing permanent access, neighboring property, or streetscape.
Can AI remove existing furniture before virtual staging?
It can produce a candidate, but large furniture hides unknown floor and wall areas. Review the cleared result before adding new furniture, and do not let a second generation hide errors from the first.
Do object-removal edits need disclosure?
Requirements vary by MLS, jurisdiction, client, and the materiality of the edit. Confirm the applicable policy rather than assuming an edit is too small to matter.
Is removing personal information different?
Privacy cleanup may be appropriate, such as obscuring a family photo or document. Use the smallest change possible and avoid altering nearby property evidence.
Remove the distraction, keep the truth
Use a source-paired workflow for decluttering and compliance review before a listing image leaves production. Explore MLS-compliant virtual staging.