
Day-to-Dusk Real Estate Photos: How to Handle Harsh Shadows and Keep the Sky Believable
A believable virtual twilight begins with the daylight evidence. Learn which shadows can be softened, which details must stay, and how to inspect the final.
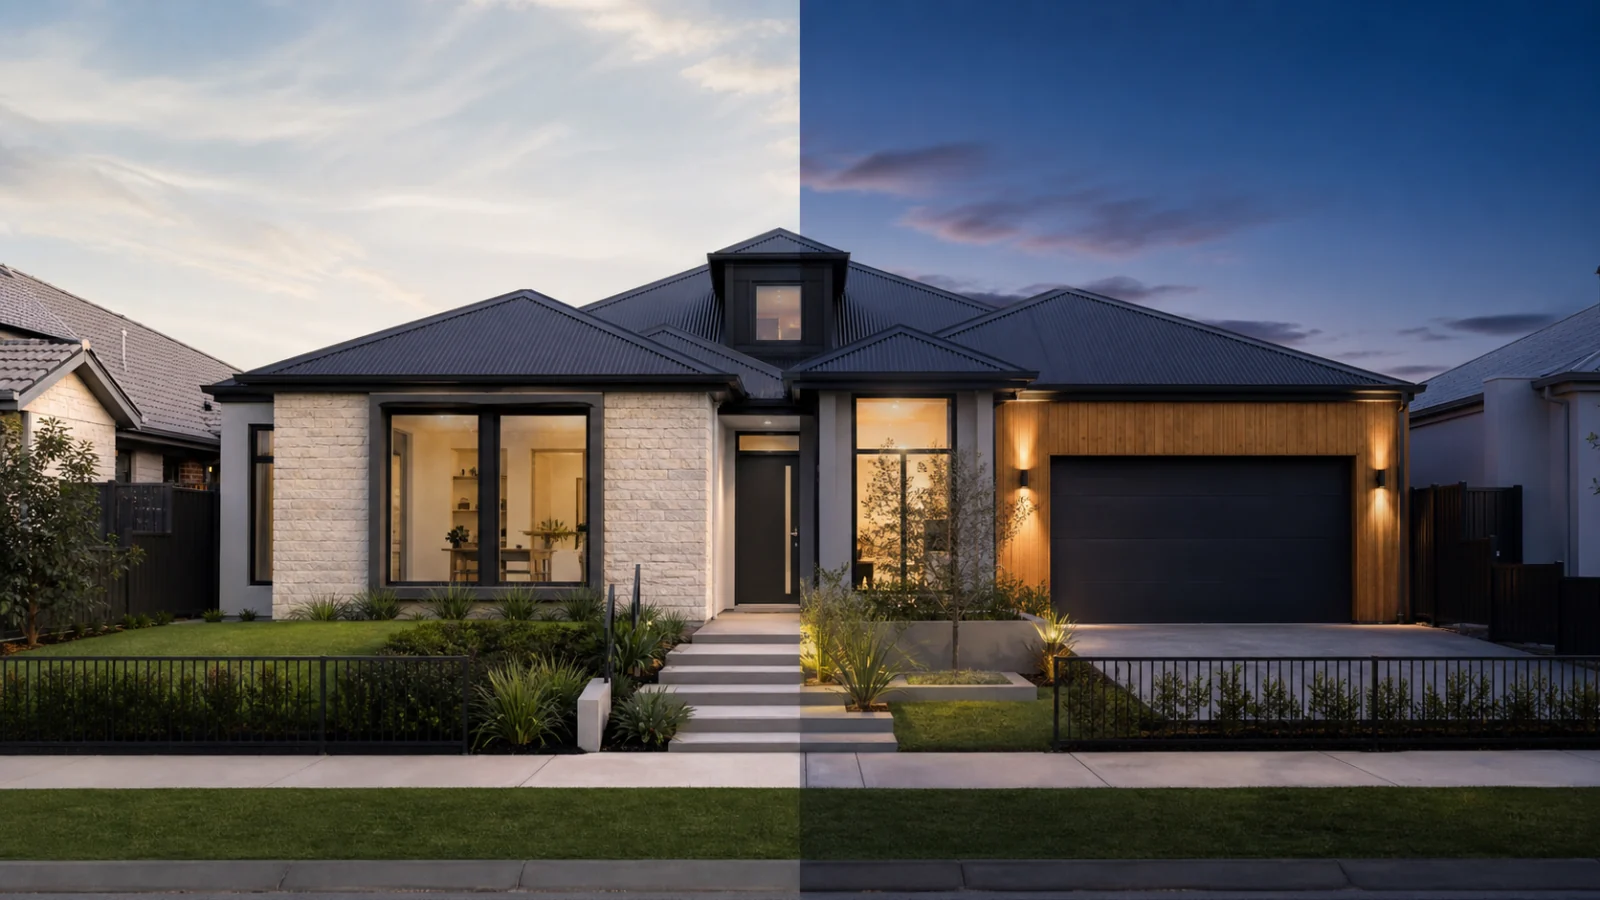
A believable day-to-dusk edit changes the time-of-day presentation without rewriting the property. Start with a well-exposed exterior, preserve the building, landscaping, neighboring context, power lines, windows, and permanent lights, then darken the scene around a plausible blue-hour sky. Harsh midday shadows can be reduced, but they cannot be ignored: their direction still describes the original sun. Window glow should come from existing windows and should influence nearby surfaces subtly. Never invent a sunset direction that conflicts with the highlights on the home. Compare the conversion with the source at full resolution, disclose synthetic twilight where required, and keep both files together.
Choose a source that can survive conversion
Day-to-dusk editing is not a rescue for every exterior. A strong source has:
- Clean building edges and enough highlight detail on light-colored walls.
- Visible window frames rather than completely black or clipped panes.
- Recoverable sky boundaries around trees, railings, and rooflines.
- Limited motion in leaves, flags, vehicles, or people.
- A camera position that already works as a listing hero image.
An image shot under hard noon sun can be converted, but the editor must reconcile deep shadows and bright facades. A late-afternoon source usually requires fewer contradictions.
Preserve the facts before changing the mood
Create a protected reference layer or keep the original open beside the edit. List the features that cannot change:
- Roof shape, siding, masonry, doors, windows, garage openings, and decks.
- Permanent exterior fixtures and their locations.
- Driveway, paths, fences, trees, neighboring buildings, and utility elements.
- Visible condition such as staining, cracks, wear, or unfinished areas.
- The view and skyline.
The edit may change global brightness and the apparent sky, but it should not complete landscaping, turn off a neighboring building, remove power lines, repair a driveway, or invent architectural lighting.
Handle harsh shadows in stages
Do not flatten all shadows to the same value. Real dusk still has shape, contrast, and local light.
Reduce the daylight signature
Lower highlights on sunlit walls, reduce the strongest warm sunlight, and gently lift blocked areas only when source detail exists. Large hard-edged shadows may need localized tonal work, but their boundaries should not become blurry patches.
Rebuild overall blue-hour balance
Shift ambient light cooler while keeping materials recognizable. White siding should remain believable white, not saturated blue. Vegetation should not become neon green or black.
Add local light only where justified
Existing porch lights and windows may gain a warm appearance. That glow should be restrained:
- Light falls on nearby walls or pavement in the correct direction.
- Different fixtures do not create identical copy-pasted pools.
- Window interiors remain varied rather than uniformly orange.
- Glass reflections and frames remain visible.
If no light fixture or window supports the glow, do not invent one for drama.
Make the sky answer to the property
A replacement sky is believable when its horizon, brightness, color temperature, and cloud scale fit the photographed scene. The sky should usually be brightest near the horizon at blue hour and darker above. Avoid:
- A fiery sunset behind a facade still lit by midday sun from the opposite side.
- Oversized clouds that make a wide-angle exterior feel miniature.
- Repeated cloud patterns across every listing.
- Halos around trees, chimneys, antennas, and roof tiles.
- A horizon line that cuts through mountains or buildings.
Adobe’s current Sky Replacement controls expose useful adjustment categories—edge shift, fade, brightness, temperature, scale, and foreground lighting—but the tool does not decide whether a sky is truthful for a listing. The reviewer does.
Inspect windows at 100 percent
Windows are the fastest way to spot a synthetic twilight. Zoom in and look for:
- New panes, changed mullions, or removed blinds.
- Identical rooms repeated behind different windows.
- Orange rectangles painted over frames.
- Glow spilling through walls or rooflines.
- Reflections that still show a bright noon sky.
- Invented interior furniture or fixtures.
If the source contains no usable interior detail, a restrained dark reflection is often more credible than a fabricated room.
Keep twilight enhancement separate from property alteration
Removing a temporary car or trash bin may be a separately approved edit. Removing a permanent neighboring structure, changing landscaping, or repairing visible condition is not a normal consequence of twilight conversion. Separating those requests makes review and disclosure clearer.
Read the virtual staging disclosure guide for a source-pairing approach and the MLS photo compliance guide for a broader listing-photo review. Local requirements vary, and synthetic dusk may be treated differently from ordinary exposure correction.
A natural day-to-dusk checklist
- ☐ Source and final use the same building geometry and crop.
- ☐ Permanent fixtures, landscape, neighbors, and utility details remain.
- ☐ Harsh shadows are moderated without creating flat surfaces.
- ☐ Sky brightness and sunset direction agree with the facade.
- ☐ Roof, tree, railing, and antenna masks are halo-free.
- ☐ Window frames and pane patterns remain identical.
- ☐ Warm glow appears only where a real opening or fixture supports it.
- ☐ Reflections do not reveal a contradictory daytime sky.
- ☐ The original is retained with the final.
- ☐ The listing professional has confirmed the required disclosure.
When to photograph real twilight instead
Choose a real twilight session when the property’s actual lighting design, view, pool illumination, landscape lighting, or premium positioning is the main selling point. A conversion cannot faithfully reconstruct lighting that was never photographed.
Day-to-dusk is more suitable when:
- Scheduling or weather prevented a twilight capture.
- The property has a strong daylight exterior but simple lighting.
- The client understands the image is a transformed presentation.
- A reviewer can compare it with the source before publication.
For listings with several exterior angles, decide once whether the set represents real or virtual twilight. Mixing one real blue-hour capture with unrelated generated skies and light directions can make the property less coherent than a consistent daylight set.
Keep the twilight transformation as a separate version. Do not overwrite the daylight hero; it remains the evidence for geometry, landscape, weather, and future revisions.
Frequently asked questions
Can a day-to-dusk edit remove harsh tree shadows?
It can reduce their prominence, but fully erasing large shadows may create inconsistent texture or lighting. Use a better source when the shadow covers important property detail.
Should every window be glowing?
No. Uniform glow looks synthetic. Preserve frames and reflections, and use varied, restrained warmth only where it is plausible.
Is virtual twilight the same as sky replacement?
No. Sky replacement changes one region. Day-to-dusk also requires coherent foreground exposure, color, shadows, windows, and local lights.
Do I need to label a converted twilight?
Rules differ across MLSs and jurisdictions. Keep the source and ask the listing professional to confirm disclosure and pairing requirements.
Build mood without changing the address
Use a source-first editing workflow to create a restrained twilight candidate, then inspect the building and window evidence before delivery. Try the real estate photo editor.